
.svg)
.svg)

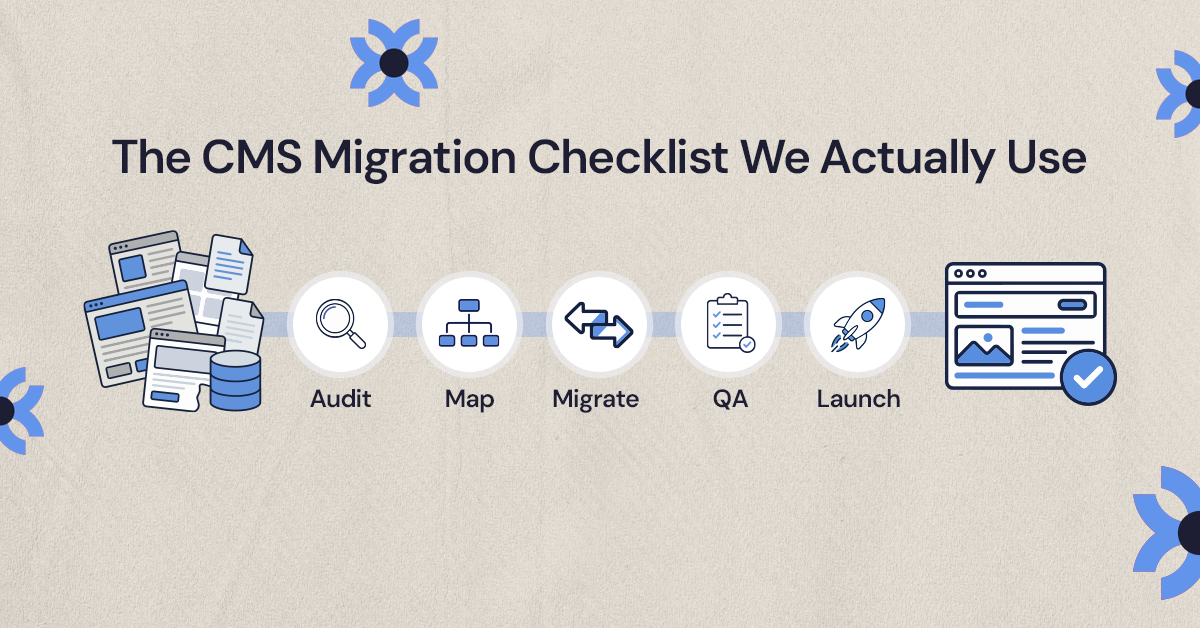
A successful CMS migration is more than moving pages from one platform to another. Before we migrate a client’s website, we audit its content and URLs, map the new CMS structure, plan redirects, preserve important SEO elements, test the new site, and only then launch it.
That process matters because a migration can look perfect on the surface while quietly creating problems underneath: lost rankings, broken URLs, missing content, poor CMS structure, broken forms, or pages that search engines can no longer access.
At NUUX, we treat a CMS migration as a controlled transfer of everything the existing website has built—not just its content. This is the checklist and workflow we use to plan, build, test, and launch a migrated website.
What Does a CMS Migration Actually Involve?
A CMS migration happens when you move a website's content and structure from one content management system to another.
That could mean:
- Moving from WordPress to Webflow
- Moving from Squarespace to another CMS
- Moving from a custom CMS to a managed platform
- Rebuilding an existing site on a new CMS
- Restructuring a website within its existing platform
- Moving content into a new CMS as part of a larger redesign
The platforms can change, but the migration principles stay largely the same.
The website has existing pages, URLs, content, images, internal links, SEO metadata, forms, integrations, and CMS relationships. Some of those need to move exactly as they are. Others need to be improved. Some may no longer be necessary.
So we don't approach migration as:
Old CMS → export → new CMS → launch
Our process is closer to:
Audit → map → structure → migrate → preserve → test → launch → monitor
That distinction is important because the goal isn't simply to make the new website work. It's to make the new website work without unnecessarily losing what the old one was already doing well.
Our CMS Migration Checklist at a Glance
Here's the process we work through before a migrated site goes live:
Now let's walk through what each stage actually involves.
Step 1: Audit the Existing Website Before Moving Anything
We start with the website that already exists.
That sounds obvious, but it's one of the easiest steps to rush. If you start building the new CMS before understanding the old one, you're likely to discover important content, URLs, or functionality halfway through the project.
We begin by taking inventory.
What we audit
Content
- Core website pages
- Service pages
- Landing pages
- Blog posts
- Case studies
- Resources
- FAQs
- CMS items
- Categories and tags
- Downloadable resources
URLs
- Current URL
- URL structure
- Existing redirects
- Indexed pages
- High-traffic pages
- Pages receiving backlinks
- Pages generating conversions
SEO
- Title tags
- Meta descriptions
- H1s and heading structure
- Canonical URLs
- Indexing directives
- XML sitemap
- Structured data, where applicable
- Internal links
Media
- Images
- PDFs
- Videos
- Downloadable assets
- Alt text
- Important media embedded within content
Functionality
- Contact forms
- Search
- Filters
- CMS relationships
- Third-party integrations
- Analytics
- Tracking scripts
- Newsletter forms
- Other custom functionality
We're not auditing all of this just to create a longer spreadsheet.
We're trying to answer a more useful question:
What actually needs to survive the migration?
Not every existing page automatically belongs on the new website.
Depending on what we find, content may be:
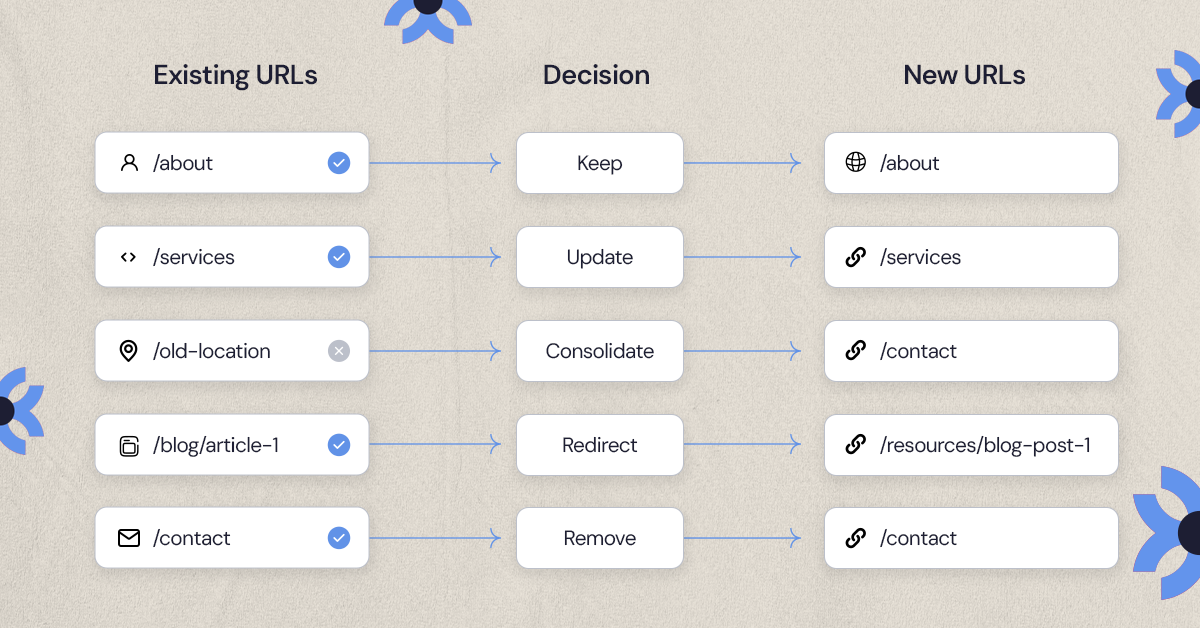
- Kept — still useful and performing well
- Improved — worth keeping but needs work
- Consolidated — overlapping pages can become one stronger resource
- Redirected — the old URL needs to point to a relevant replacement
- Removed — no longer useful or necessary
This prevents us from carrying problems from the old CMS into the new one.
Our output at this stage: a content and URL inventory that gives us a reliable picture of what we're working with before the migration begins.
Step 2: Build the Migration Map Before Building the New Site
Once we understand the existing website, we map where everything is going.
This is one of the most important documents in the migration because it connects the old website to the new one.
If a URL changes, we need to know where it is going.
If a page is being consolidated, we need to know which page replaces it.
If content is being removed, we need to know whether the old URL needs a redirect or can be retired.
The migration map we work from
A practical migration map can look like this:
The exact columns can change depending on the project, but the principle stays the same.
Every important old URL should have a defined outcome.
Why this matters
A site page that's been ranking for years at example.com/services/web-design might move, during a redesign, to example.com/web-design. The new page can contain all the right information, but search engines and users still encounter the old URL until something tells them where to go. That's why redirects don't get left until the end of a project. The old-to-new relationship is documented during planning, and on Webflow migrations specifically, this ties directly into how Webflow handles redirect rules once the map is built.
The migration map also becomes a QA document later. The live site gets checked against it instead of relying on memory to confirm everything made the move.
Step 3: Rebuild the CMS Structure, Not Just the Pages
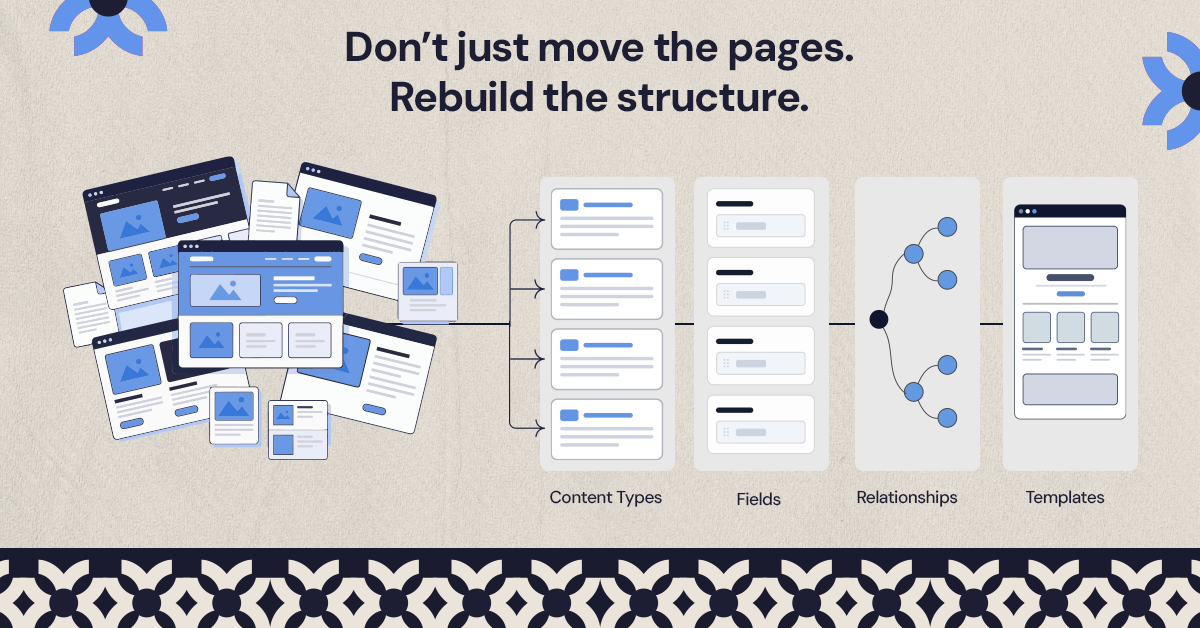
A migration is a good opportunity to ask whether the existing CMS structure actually makes sense.
A website can have perfectly good content stored in a CMS that has become difficult to maintain.
For example, a company might have:
- Blog posts
- Case studies
- Services
- Team members
- Resources
But instead of these being structured as reusable content types, parts of the website may have been manually built or duplicated over time.
We don't want to reproduce that problem in the new CMS.
First, we identify the content types
For example:
- Blog
- Case studies
- Services
- Resources
- Team
- FAQs
Then we determine what information belongs to each content type.
A blog collection might need:
- Title
- Slug
- Author
- Publish date
- Featured image
- Category
- Body content
- Excerpt
- SEO title
- Meta description
A case study might need:
- Client
- Industry
- Services
- Project summary
- Challenge
- Solution
- Results
- Featured image
- Related services
Then we map relationships
This is where CMS architecture becomes especially important.
A case study might relate to a particular service.
A blog post might belong to a category.
An author might be connected to multiple articles.
Instead of manually repeating the same information across pages, we structure those relationships so the CMS can manage them.
The goal isn't to make the CMS clever for the sake of it
The goal isn't to make the CMS clever for the sake of it. We're building around how the client will actually use the website. We ask:
- What content will they update regularly?
- What should be dynamic?
- What should be reusable?
- Which fields need to be controlled?
- Which content needs flexibility?
- What will make future updates faster?
For a Webflow migration, this can mean defining CMS collections, reference fields, collection templates, and dynamic content before the content is fully migrated. Moving off WordPress specifically carries its own quirks around how content types and taxonomies translate into Webflow migrations, since the two platforms handle content structure differently from the ground up.
Our output at this stage: a CMS structure that works for the new website and for the people who will maintain it afterward.
Step 4: Plan the Content Migration
Once the new structure is defined, we can decide how the content itself will move.
This is where the distinction between content migration and page rebuilding matters.
Some content can be moved systematically.
Other content may need to be manually rebuilt because it depends on custom layouts, components, embeds, or functionality that doesn't transfer directly between platforms.
We determine what can be transferred and what needs rebuilding
For example:
Structured CMS content
Can often be exported, transformed, and imported into the new CMS.
Custom pages
May need to be rebuilt manually.
Images and assets
Need to be transferred and checked rather than assuming every asset will arrive correctly.
Content that needs cleanup
Should be addressed rather than blindly copied.
We also preserve the content hierarchy
When content moves, we check more than whether the words are still there.
We look at:
- H1s
- H2s and H3s
- Lists
- Tables
- Links
- Images
- Embeds
- CTAs
- Downloadable resources
A page can technically contain the same copy while still being a poor migration if its structure has been damaged.
This is one of the biggest advantages of auditing first.
If an old website has:
- outdated articles
- duplicate pages
- broken links
- unnecessary categories
- inconsistent formatting
- obsolete assets
we don't need to reproduce all of that simply because it exists in the old CMS.
The migration gives us a chance to improve the content system at the same time.
Step 5: Handle URLs and Redirects Before Launch
Redirects are one of the areas where a CMS migration can have a direct impact on SEO.
If an important URL changes and the old URL isn't handled correctly, users can land on a 404 instead of the new page. Search engines also need to understand where the old URL has moved.
That's why we handle redirects as part of the migration, not as something to figure out after launch.
We start with the migration map
The URL map we created earlier tells us which pages have changed and where they should go.
For each important changed URL, we determine the most relevant destination.
For example:
Old:
/services/web-design
New:
/web-design
The old URL should point directly to the new equivalent.
We don't automatically send every old URL to the homepage.
If an old service page has a relevant replacement, the redirect should point there.
We also look for redirect chains
For example:
Old URL → Temporary URL → New URL
is less useful than:
Old URL → New URL
The goal is to make the redirect path as direct as possible.
Then we test the redirects
Before launch, we check:
- Does the old URL redirect?
- Does it return the expected status?
- Does it reach the correct destination?
- Is there a redirect chain?
- Is there a redirect loop?
- Are important URLs missing from the redirect list?
This is one reason the migration map becomes so useful during QA: we're not guessing which URLs matter.
Step 6: Preserve the SEO Elements That Already Work
SEO preservation isn't about adding SEO at the end of a migration.
It's about making sure the migration doesn't accidentally remove the work the existing website has already done.
We check page-level SEO
For important pages, we verify:
- Title tags
- Meta descriptions
- H1s
- Heading hierarchy
- Canonical URLs
- Image alt text
- Indexability
We check technical SEO
Depending on the site, that can include:
- XML sitemap
- Robots.txt
- Canonical tags
- Noindex directives
- Structured data
- Internal links
- Pagination
- URL structure
We prioritize pages instead of treating every URL equally
A site may contain hundreds or thousands of URLs, but they don't all carry the same level of risk.
We pay particular attention to pages that:
- Receive organic traffic
- Rank for valuable keywords
- Have backlinks
- Generate leads or conversions
- Matter to the business strategically
If a page is responsible for significant organic traffic, it deserves more scrutiny during migration than a page that nobody visits.
The objective is not to promise that rankings will never move after a migration. Search performance can change for many reasons.
The objective is to control the variables we can control.
Step 7: Build and Validate the New CMS
Now we move into the actual implementation.
The new CMS should be built from the architecture and migration map we've already established.
We build the templates and structures first
For CMS-driven websites, that may include:
- Collection templates
- Blog templates
- Case study templates
- Service templates
- Category pages
- Resource templates
This gives us a consistent framework for the content being migrated into the new system.
Then we validate the dynamic content
We check that:
- CMS fields populate correctly
- Images render correctly
- Slugs are correct
- Internal links work
- CMS relationships work
- Templates display correctly
- Filters work
- Pagination works where applicable
- No empty or unintended pages are being generated
For example, if a case study is supposed to display the related service automatically, we don't just check the case study itself. We check that the CMS relationship is actually producing the correct result.
That is the difference between checking a few pages manually and actually validating the CMS.
Step 8: QA the Entire Site Before Launch
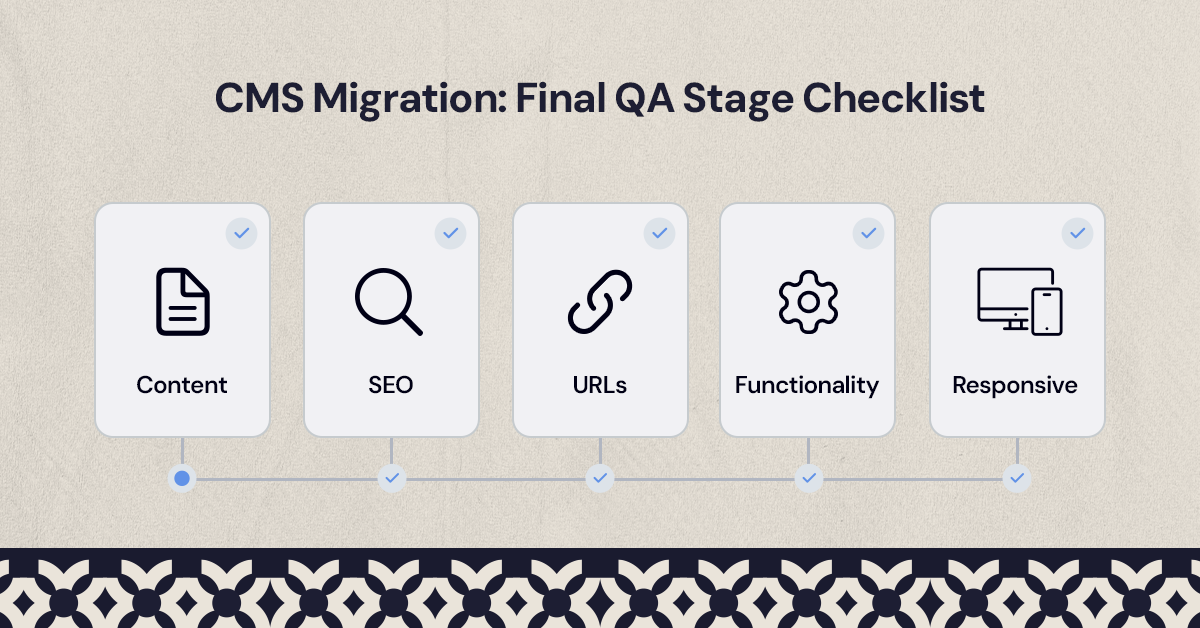
We don't consider a migration ready because the homepage looks good.
The homepage can look perfect while the rest of the site contains broken links, missing content, incorrect redirects, or CMS errors.
So QA happens across several layers.
Content QA
We check for:
- Missing pages
- Missing CMS items
- Incorrect copy
- Formatting issues
- Missing images
- Incorrect alt text
- Broken embeds
- Missing downloads
Link QA
We check:
- Main navigation
- Footer links
- Internal links
- External links
- CTAs
- Breadcrumbs, where applicable
Functional QA
We test:
- Contact forms
- Search
- Filters
- Menus
- Newsletter forms
- Integrations
- Tracking
- Interactive elements
Responsive QA
The site also needs to work across:
- Desktop
- Tablet
- Mobile
We specifically look for:
- Text overflow
- Broken layouts
- Navigation problems
- Image scaling
- Button issues
- Form problems
- Elements that don't adapt properly
SEO QA
We crawl the staging site and check:
- Status codes
- Titles
- Meta descriptions
- H1s
- Canonicals
- Indexability
- Redirects
- Internal links
- Sitemap
- Unexpected 404s
This is also where we compare the migrated website against the original inventory.
If the old site had 200 important pages and the new site appears to have 183, we need to know what happened to the missing 17.
Step 9: What Do We Check on the Staging Site?
The staging website is our controlled environment before launch.
It's where we want to find problems, not after the domain has already been switched over.
Before approving a migration, we work through the staging environment and verify the major areas of the site.
Content
- Important pages are present
- CMS content is complete
- Images and assets load
- Formatting is intact
SEO
- Metadata is present
- Canonicals are correct
- Indexing controls are intentional
- Redirects are configured
- Internal links are working
Functionality
- Forms submit correctly
- Integrations work
- Navigation works
- CMS functionality works
UX
- Layouts work across devices
- CTAs work
- Navigation is usable
- No obvious responsive issues remain
Technical
- No unexpected 404s
- No broken internal links
- No redirect loops
- No accidental indexing issues
If staging is intended to stay out of search results before launch, we also verify that the appropriate indexing controls are in place.
The point is simple:
Staging is where we catch migration problems while they're still easy to fix.
Step 10: Prepare for Launch
Once QA is complete, we prepare the production launch.
This is where having a documented migration process pays off.
Our pre-launch checklist includes:
- Final content approval
- Final redirect list
- SEO verification
- Analytics verification
- Form testing
- Domain/DNS plan
- Sitemap
- Robots directives
- Tracking scripts
- Backup/export of the old site where appropriate
We also make sure everyone knows who owns each launch task.
Someone should be responsible for knowing:
- Who is publishing the new site
- Who is handling DNS/domain changes
- Who is checking redirects
- Who is testing forms
- Who is verifying analytics
- Who is checking the live site
A migration has enough moving parts without leaving critical launch tasks assigned to “someone.”
Step 11: What Do We Check Immediately After Launch?
Launch isn't the end of the migration.
It's the point where we move from a controlled staging environment to the live website, so we immediately check the things that could have changed during that transition.
We verify:
- Homepage
- Priority landing pages
- CMS templates
- Navigation
- Forms
- Redirects
- Canonical URLs
- Robots.txt
- XML sitemap
- Analytics
- Search Console
- 404 errors
Then we crawl the live website
We compare the production site against the migration map and look for unexpected differences.
That can reveal:
- Missing pages
- Broken redirects
- Unexpected 404s
- Duplicate URLs
- Accidental noindex directives
- Broken internal links
- CMS items that didn't publish correctly
We also monitor organic performance
A migration doesn't come with a guarantee that every ranking will remain exactly where it was.
But monitoring gives us a way to identify unusual changes and investigate them.
The important pages we identified during the initial audit are the ones we pay closest attention to.
The Complete CMS Migration Checklist
Here's the condensed version you can use when planning your own migration.
Before migration
- Audit existing pages
- Audit CMS content
- Inventory URLs
- Identify high-value pages
- Review organic traffic and rankings
- Identify pages with backlinks
- Audit metadata
- Inventory media and assets
- Document forms and integrations
- Decide what stays, changes, consolidates, redirects, or goes
During planning
- Create an old-to-new URL map
- Define redirect destinations
- Identify new CMS content types
- Define CMS fields
- Map CMS relationships
- Plan templates
- Decide how each content type will be migrated
- Identify content requiring manual rebuilding
During migration
- Transfer CMS content
- Transfer media
- Rebuild custom pages
- Rebuild CMS templates
- Preserve important URLs where possible
- Implement metadata
- Implement redirects
- Rebuild internal links
- Validate CMS relationships
Before launch
- Crawl staging
- Check missing content
- Test redirects
- Check metadata
- Check canonicals
- Check indexability
- Test forms
- Test integrations
- Test navigation
- Test responsive layouts
- Check internal links
- Verify analytics
- Confirm DNS/domain plan
- Approve final launch checklist
After launch
- Crawl the live website
- Check priority URLs
- Check redirects
- Check 404s
- Check sitemap
- Check robots.txt
- Check Search Console
- Check analytics
- Check CMS functionality
- Monitor organic performance
How Long Does a CMS Migration Take?
There isn't a useful universal timeline for a CMS migration.
The amount of work depends on what you're moving and how much needs to change along the way.
Factors include:
- Number of pages
- Number of CMS items
- Number of CMS collections
- Complexity of the existing site
- Number of templates
- URL changes
- Content cleanup
- Integrations
- Custom functionality
- SEO requirements
- Design changes
- Migration method
A 30-page marketing website and a content-heavy site with thousands of CMS items should not be treated as the same migration project.
The audit and migration map help establish the real scope before implementation starts.
When Should You Consider a CMS Migration?
A CMS migration makes sense when the current platform is creating a real business or operational problem.
For example:
- Your team struggles to update the website
- The CMS doesn't support how your content is structured
- The website has become difficult to maintain
- The platform limits the site's design or functionality
- The current CMS is outdated
- You're rebuilding the site and the existing CMS no longer fits
- Content has grown beyond the current structure
- You're consolidating multiple websites
- You need better control over the website's content system
But a newer CMS isn't automatically a better CMS.
The question should be:
What problem will the new CMS solve that the current one doesn't?
If there isn't a good answer, migrating just for the sake of changing platforms can create unnecessary work and risk.
A CMS Migration Should Leave You With a Better Website
A successful CMS migration isn't measured by whether the new website looks like the old one on a different platform.
It's measured by whether the new site is properly structured, functional, manageable, and able to retain the value the existing website has already built.
That's why our process starts before we touch the new CMS.
We audit what exists. We map where it needs to go. We design the new content structure. We plan redirects and SEO preservation. Then we migrate, test, launch, and check the live site.
At NUUX, we can apply that process whether you're moving to Webflow or another CMS. The platform may change, but the principle stays the same: move the website deliberately, protect what matters, and use the migration as an opportunity to build a better foundation.
Want results like this
Your website should make money, not excuses. Let us find the revenue hiding in your current experience.
FAQs
Quick answers to the questions we hear most about website conversion and UX design.
Start with an audit of your existing content, URLs, SEO elements, media, CMS structure, forms, integrations, and other functionality. Then identify which content should be kept, updated, consolidated, redirected, or removed before building the new site.
It can. Changes to URLs, redirects, content, internal links, metadata, canonicals, or indexing settings can affect search visibility. A well-planned migration reduces unnecessary risk by identifying important URLs and SEO elements before the move and validating them afterward.
If important URLs are changing, redirects are generally needed to send users and search engines from the old URL to its relevant replacement. The redirect should point to the closest equivalent destination rather than automatically sending every old URL to the homepage.
Map existing URLs, preserve important content and metadata, implement appropriate redirects, maintain canonical and indexing settings, rebuild internal links, verify the sitemap, and monitor the live site after launch. The goal is to preserve the SEO value that already exists while the site moves to its new platform.
Test content, CMS templates, internal links, forms, integrations, responsive layouts, redirects, metadata, canonicals, indexability, sitemap configuration, analytics, and important URLs. A full staging crawl can also identify broken links, unexpected 404s, and other issues before the site goes live.
Related articles
More field notes on conversion, UX, and building websites that sell.


